Installing Active Directory using PowerShell involves several steps, including installing the necessary Windows features and promoting the server to a domain controller.
Here’s a detailed guide:
Ports Pre-requisite:
Port 53 TCP/UDP — DNS
Port 88 TCP/UDP — Kerberos
Port 336 TCP/UDP — LDAPS
Port 389 TCP/UDP — LDAP (Lightweight Directory Access Protocol)
**********************************************************************************************************************************
Configure TCP/IP
Uncheck IPv6 on TCP/IP settings in Windows Server, you typically go through the network adapter properties. Here’s how you can do it:
Get-NetAdapterBinding

Get-NetAdapterBinding -Name "Ethernet"

Disable-NetAdapterBinding -Name "Ethernet0" -ComponentID ms_tcpip6 -Confirm:$false
				$IPAddress = "10.1.0.4"
$SubnetMask = "255.255.255.0"
$Gateway = "10.1.0.1"

New-NetIPAddress -InterfaceAlias "Ethernet" -IPAddress $IPAddress -PrefixLength 24 -DefaultGateway $Gateway
Set DNS Servers:
				$PrimaryDNS = “168.63.129.16”
$SecondaryDNS = "8.8.8.8"

Set-DnsClientServerAddress -InterfaceAlias "Ethernet" -ServerAddresses $PrimaryDNS,$SecondaryDNS

Verify TCP/IP Setting
To verify that the settings have been applied correctly, you can use PowerShell cmdlets to check the network configuration:
ipconfig /all
Step 1: Install Active Directory Domain Services (AD DS)
Open PowerShell as Administrator:
Right-click the PowerShell icon and select “Run as Administrator.”
Install the AD DS Feature:
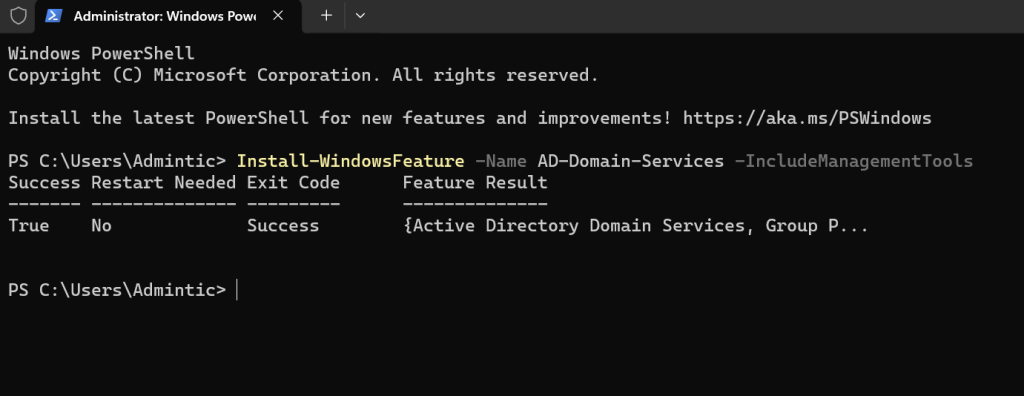
Execute the following command to install the AD DS role:

Install-WindowsFeature -Name AD-Domain-Services -IncludeManagementTools
Step 2: Configure a New Active Directory Forest
Promote the Server to a Domain Controller:
Replace TIC.local with your desired domain name.
Entre the DSRM Password (The DSRM password is a unique password used to access the Directory Services Restore Mode in Windows Server’s Active Directory domain services.):
				Import-Module ADDSDeployment
Install-ADDSForest -DomainName "Tic.local" -InstallDNS

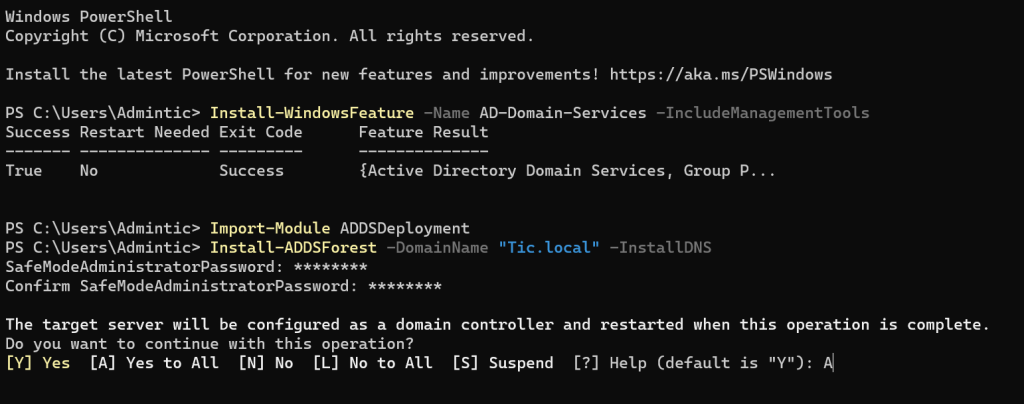
				Import-Module ADDSDeployment
Install-ADDSForest -DomainName "Tic.local" -InstallDNS
SafeModeAdministratorPassword: ************
Confirm SafeModeAdministratorPassword: ************
Step 3: Verify Installation
Check Installation Status : After the server reboots, open PowerShell and run:
Get-Service adws,kdc,netlogon,dns
Check DNS Configuration:
Open PowerShell as Administrator.
Run the following command to check DNS settings

Step 4: Optional Post-Installation Steps
Create Users and Groups:
Create a new user:
New-ADUser -Name "Alex Due" -GivenName Alex -Surname Due -SamAccountName adue -UserPrincipalName adue@tic.local -Path "CN=Users,DC=Tic,DC=local" -AccountPassword (ConvertTo-SecureString "P@ssw0rd" -AsPlainText -Force) -Enabled $true

Create a new group:
New-ADGroup -Name "SalesGroup" -GroupScope Global -Path "CN=Users,DC=Tic,DC=local"

Add user to the group:
Add-ADGroupMember -Identity "SalesGroup" -Members "adue"
est Domain Controller Functionality
Join a test machine to the “Tic.local” domain to ensure that domain controller functionality is operational.


