Introduction
This guide provides a detailed step-by-step process for setting up an Active Directory (AD) environment with two domain controllers (DCs). It covers the installation of virtual machines, applying system updates, configuring Active Directory Domain Services (AD DS), creating a domain forest, and ensuring proper replication between the two domain controllers. This setup ensures redundancy and enhances the reliability of the AD infrastructure.
Step 1: Preparing the Infrastructure
Installation of Two Virtual Machines (VMs)
Create VMs on Hyper-V, Azure or your preferred hypervisor
a) VM1 DC1 – Primary Domain Controller.
b) VM2 DC2 – Secondary Domain Controller.
c) Configure Network Settings. .
d) Apply Patches to Both VMs.
- a) Open Settings > Windows Update
- b) Download and install all updates
- c) Restart both servers.
Step 2: Deploying Active Directory
Install Active Directory Domain Services (AD DS)
a) Install AD DS Role on DC1.
2) Create the Active Directory Forest : for example (TIC.local)
2.1 Promote DC1 as the Primary Domain Controller.
3) Add DC2 as a Secondary Domain Controller.
3.1 Join DC2 to the Domain.
3.2 Promote DC2 as a Domain Controller.
3.3 Verify Replication.
Conclusion.
Step 1: Preparing the Infrastructure
—Installation of Two Virtual Machines (VMs)
Create VMs on Hyper-V, Azure or your preferred hypervisor
a)VM1 DC1 – Primary Domain Controller
4 vCPU, 4 GB RAM, 60 GB disk
Windows Server 2019
b) VM2 DC2 – Secondary Domain Controller
4 vCPU, 4 GB RAM, 60 GB disk
Windows Server 2019
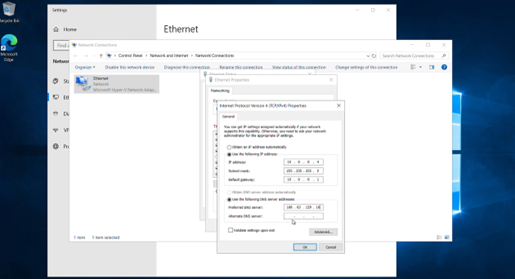
c) Configure Network Settings
DC1:
IP: 10.0.0.4
DNS: 127.0.0.1
Gateway: 10.0.0.1

a) Restart both servers.
Step 2: Deploying Active Directory
-Install Active Directory Domain Services (AD DS)
Install AD DS Role on DC1
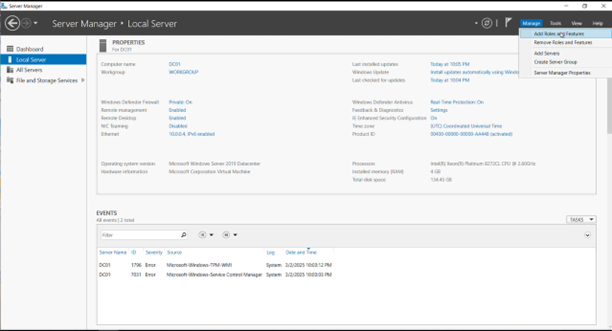
- Open Server Manager.
- Click Manage > Add Roles and Features.
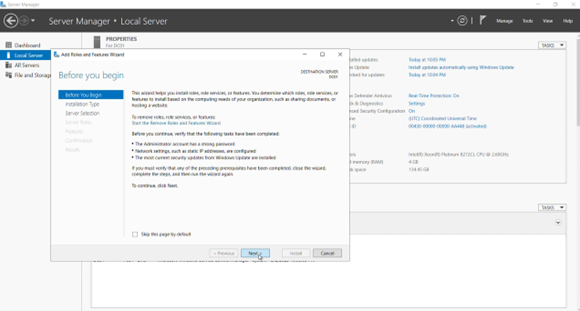
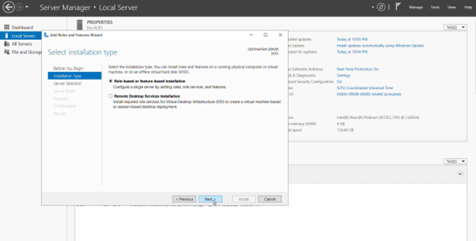
- Select Role-based or feature-based installation
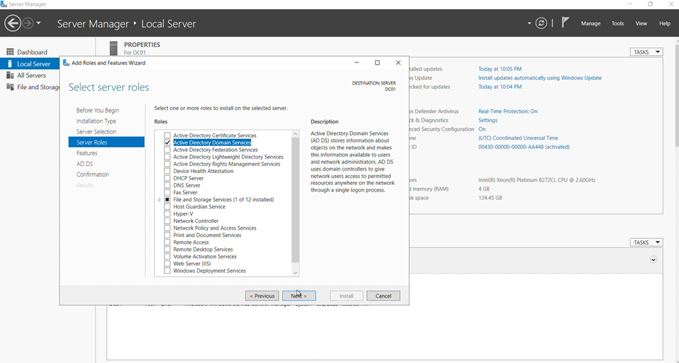
- Select the server and check Active Directory Domain Services
- Click Next
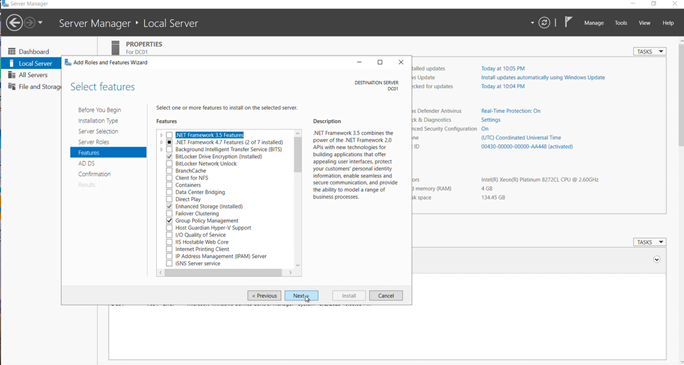
- Click Next and Install.
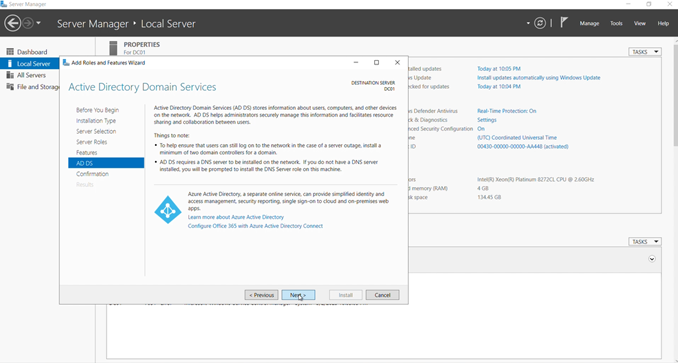
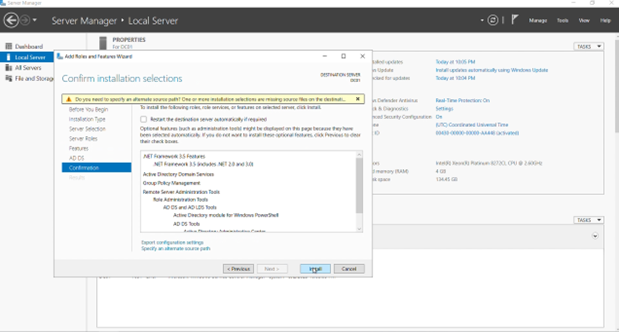
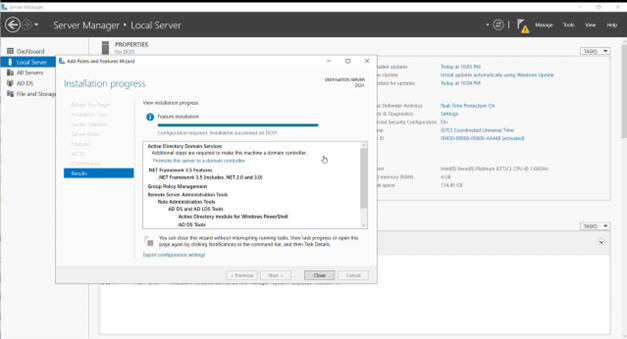
After completing the AD DS installation, let’s create the Active Directory Forest
1) Create the Active Directory Forest : for example (TIC.local)
– Promote DC1 as the Primary Domain Controller
- In Server Manager, click Promote this server to a domain controller.

- Select Add a new forest and enter ( TIC.local ).
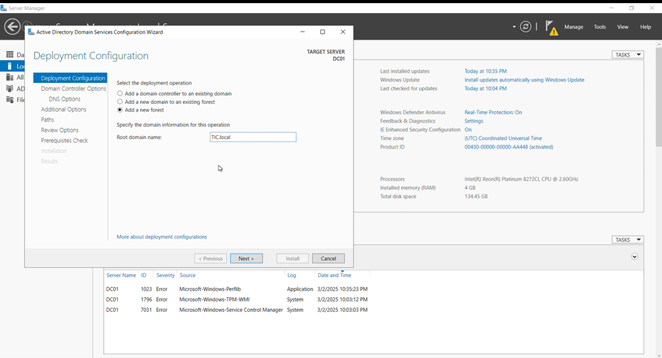
- Choose Forest and Domain Functional Level: Windows Server 2016.
NOTE: If you’re installing Windows Server 2025, you should set both the Forest and Domain Functional Levels to Windows Server 2025 to take advantage of the latest Active Directory features and security enhancements.
- Set a Directory Services Restore Mode (DSRM) password.
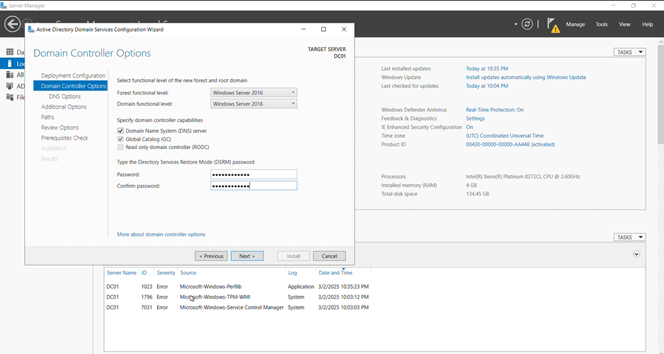
Important Note: Ensure you remember the DSRM password, as it is required to restore the NTDS database in case of server failure or database corruption. Losing this password could prevent the recovery of your Active Directory environment.
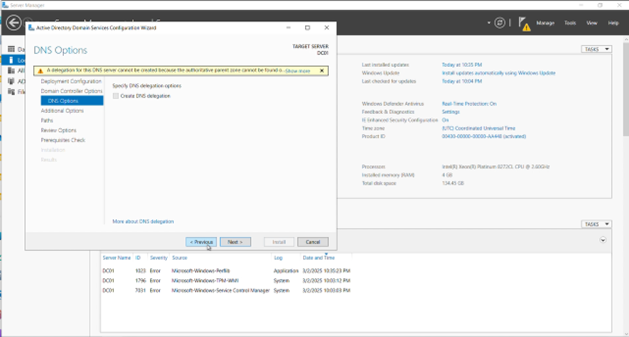
- DNS delegation is not needed at this stage as no DNS server has been configured yet.
- For more information of DNS server check this link . click Next
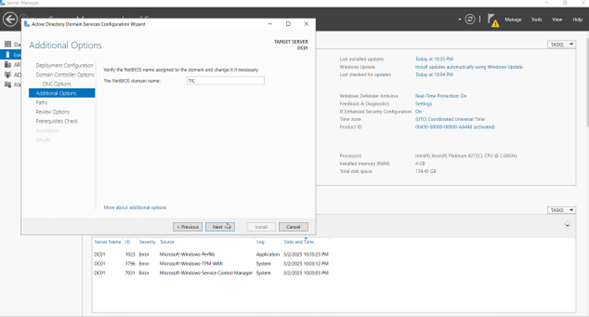
- Enter the NetBIOS domain name (default recommended by Microsoft).
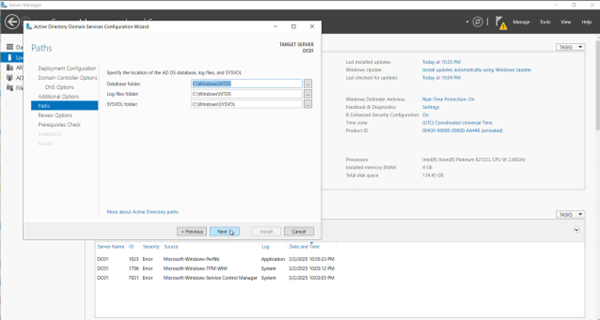
- Specify the database, log, and SYSVOL paths (default recommended by Microsoft).
- Click Next and Install
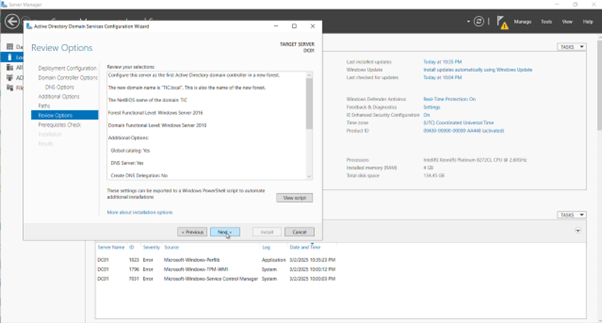
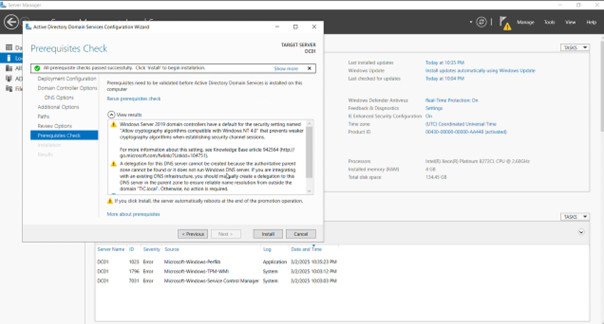
Note: The server will restart automatically to complete the installation. If it does not restart by itself, reboot manually to continue.
1) Add DC2 as a Secondary Domain Controller
-Join DC2 to the Domain
- Open System Properties.
- Click Change settings > Change.
- Enter TIC.local and provide domain admin credentials.
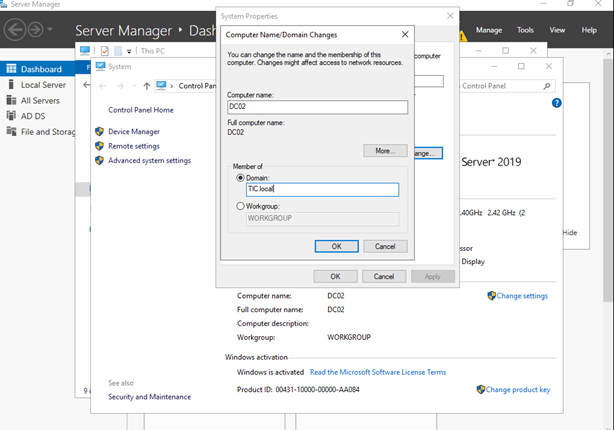
- Restart the server.
Install AD DS role. Follow the steps of DC1 installation
-Promote DC2 as a Domain Controller
- In Server Manager, click Promote this server to a domain controller.

- Select Add a domain controller to an existing domain.

- Provide credentials and select DNS Server and Global Catalog (GC).

- Do not select DNS delegation, as DNS will be configured later. click Next

- Choose Replication from:
- Any domain controller (default) OR
- A specific domain controller.

- Specify the database, log, and SYSVOL paths (default recommended by Microsoft)

- Click Next and Install. The server will restart automatically to complete the installation. If it does not restart by itself, reboot manually to continue.


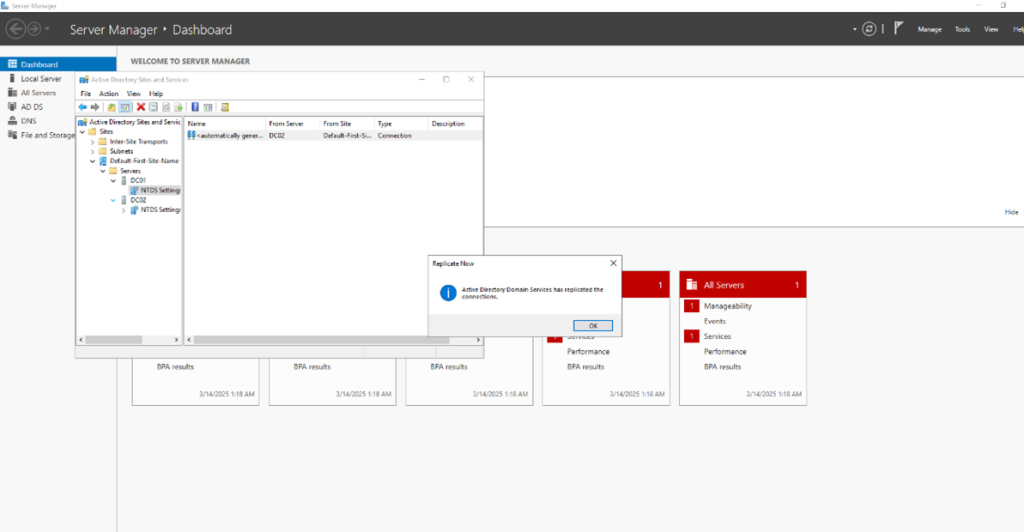
- Expand Sites → Default-First-Site-Name → Servers

- Click on the first Domain Controller (DC1)

- Right-click on the Connection Object (under NTDS Settings)
- Select Replicate Now.
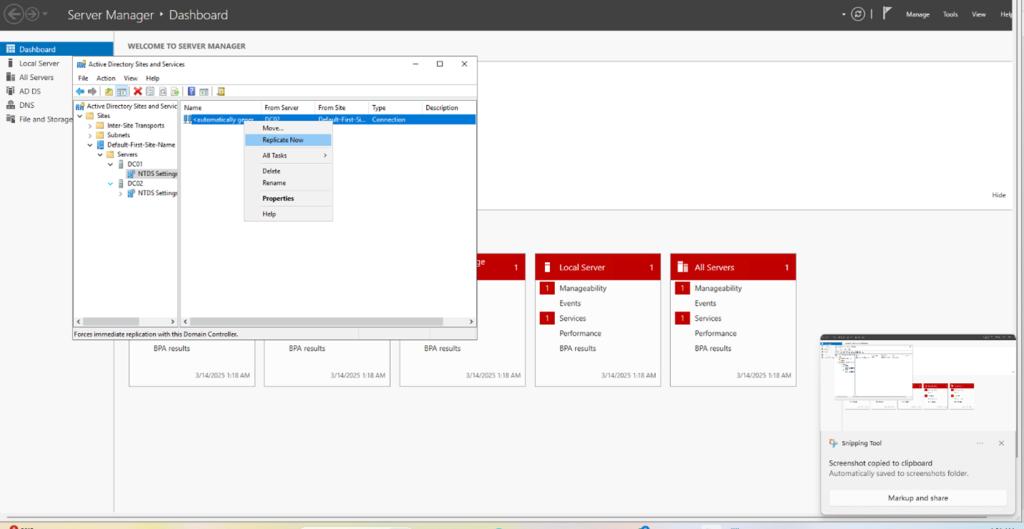
- A confirmation message should appear indicating success
Conclusion
With this setup, your Active Directory environment is fully configured for user and group management, policy enforcement, and secure authentication. To ensure long-term stability and security, it is essential to regularly monitor replication, apply system updates, and follow best practices for backup and disaster recovery


